Integrating with Contentful
In this tutorial we will implement a basic integration with Contentful.
Contentful provide a few ways to get data, including GraphQL. In this tutorial we will be using REST as it's included in all their plans.
We recommend you go through the json placeholder example first as it explains the basics of writing an extension and we will be skipping past a few details.
Overview
We will get 'course' information from Contentfuls example data.
We will be explaining how to add API auth details to your Deity Cloud instances and to your server/config/local.json file.
1. Getting set up with Contentful
i. Create an account
If you don't already have a Contentful you'll have to create one. This is easy and they have free plans if you're just testing it out.
ii. Set up your content model
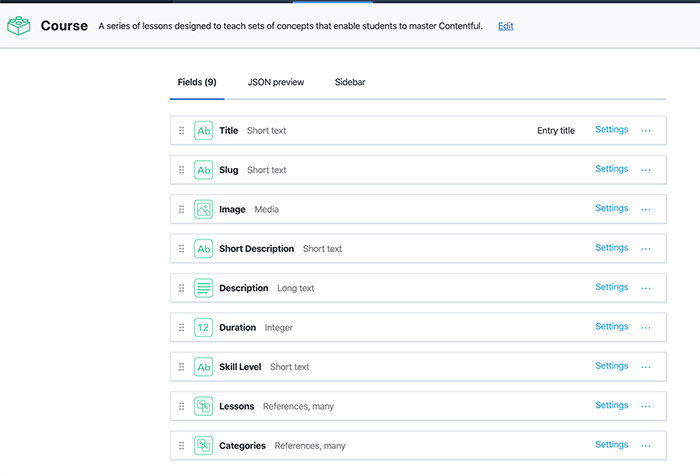
This tutorial focuses on getting a course content model. This comes as part of their example data. If you're not using this model a few details later on may vary.
iii. Add some content entries
Once you've got your content model setup you'll need to add some content. Again we are using the sample data that comes with 2 'courses' ('Hello Contentful' & 'Hello SDKs').
iiii. Get your credentials
The last thing you'll need to do on Contentfuls side is get your credentials.
You'll need your:
- Content Delivery API key
- Space ID
- Environment ID
- Content Type ID
You can get all of these from your admin.

You can get your Content Delivery API Key and Space ID from the API keys section in your dashboard.
Your Environment ID from the environments section. If you're using sample data, this is master.
To get your Content Type ID go to your content model and it will be in the sidebar. Using the sample data it will be course.
2. Creating your API and Extension packages
Contentful have a really handy API testing tool as part of their docs meaning you don't need to use a tool like Postman.
The json placeholder example covers this section in more detail.
i. Create your extension and API files
You'll need to create the following files:
|-server
  |-config
    local.json (this might already exist)
  |-src
    |-falcon-content-extension
      index.js
      schema.graphql
    |-falcon-contentful-api
      index.js
ii. Register you API and extension
These are registered in your server/config/default.json. Remember the api passed to the extension must match the name defined in the api, in this case contentful.
server/config/default.json
{
  ...
  "apis": {
    ...
    "contentful": {
      "package": "./src/falcon-contentful-api/index.js",
      "config": {
        "host": "cdn.contentful.com",
        "protocol": "https"
      }
    }
  },
  "extensions": {
    ...
    "falcon-content-extension": {
      "package": "./src/falcon-content-extension",
      "config": {
        "api": "contentful"
      }
    }
  }
}
iii. Create your extension
server/src/falcon-content-extension/index.js
module.exports = () => ({});
server/src/falcon-content-extension/schema.graphql
extend type Query {
  courses: Courses! @cache(ttl: 15)
}

type Courses {
  items: [Course]
}

type Course {
  fields: CourseData
}

type CourseData {
  title: String
  description: String
}
n.b. We're only adding title and description to the course for now. You could of course add what ever fields you need.
iiii. Create your API files
server/src/falcon-contentful-api/index.js
const { ApiDataSource } = require('@deity/falcon-server-env');

module.exports = class ContentfulApi extends ApiDataSource {
  async courses() {
    const { environment, spaceId, contentDeliveryApi } = this.config;
    const query = {
      access_token: contentDeliveryApi,
      content_type: 'course'
    };
    const data = await this.get(`/spaces/${spaceId}/environments/${environment}/entries`, query);
    const courseCollection = JSON.parse(data);

    const { items } = courseCollection;

    return {
      items
    };
  }
};
Notice we're pulling details from our config (const { environment, spaceId, contentDeliveryApi } = this.config;).
this.config has access to anything passed in config: {} in your json file. We've noted added environment, spaceId or contentDeliveryApi yet but will in the next section.
The content_type const should be your Content Type ID, in our case it's course.
3. Adding your credentials locally
We don't want to commit our API keys so, for now we'll add these to a server/config/local.json. This is merged into your default.json but not committed (see this doc for more information).
The name of the API needs to be the same as in server/config/default.json. In this case it's contentful.
server/config/local.json
{
  ...
  "apis": {
    "contentful": {
      "config": {
        "spaceId": "[SPACE_ID]",
        "contentDeliveryApi": "[CONTENT_DELIVERY_API]",
        "environment": "[ENVIRONMENT_ID]"
      }
    }
  },
}
4. Testing your GraphQL
You're now ready to test your extension. Make sure falcon-server is up and running.
To use this tool it must be running on port 4000 (http://localhost/4000/graphql).
5. Using your data in Falcon Client
As before, this section is largely covered in the json placeholder example.
We will need to create the following files in client.
|-client
  |-src
    |-components
      |- Course
        index.js
        CourseList.js
        CourseListQuery.js
client/src/components/Course/index.js is just used to export the other files.
client/src/components/Course/index.js
export * from './CourseList';
export * from './CourseListQuery';
i. Get your data
client/src/components/Course/CourseListQuery.js
import gql from 'graphql-tag';
import { Query } from '@deity/falcon-data';

const GET_COURSE_LIST = gql`
  query CourseList {
    course {
      items {
        fields {
          title
          description
        }
      }
    }
  }
`;

export class TodoListQuery extends Query {
  static defaultProps = {
    query: GET_COURSE_LIST
  };
}
ii. Use your data
client/src/components/Course/CourseList.js
import React from 'react';
import { CourseListQuery } from './CourseListQuery';

export const CourseList = () => {
  return (
    <>
      <CourseListQuery>
        {({ data: { course = {} } }) => {
          const { items = [] } = course;
          if (items.length) {
            const courseItems = items.map(item => {
              const { fields } = item;
              return (
                <li>
                  <h3>{fields.title}</h3>
                  <p>{fields.description}</p>
                </li>
              );
            });

            return <ul>{courseItems}</ul>;
          }
          return null;
        }}
      </CourseListQuery>
    </>
  );
};
Now you've created your <CourseList> component, if you want to see it on the frontend you'll need to include it somewhere.
6. Moving your credentials to your environment
In step 3 we added our API keys to our config/local.json file. This isn't committed so won't work anywhere other than locally.
To use this config on a remote environment we will want to use a server/config/custom-environment-variables.json file.
Learn about our config files here.
i. Add our aliases to custom-environment-variables.json
In this file we add aliases for config variables. To avoid collisions we've prefixed ours with CONTENTFUL.
{
  ...
  "apis": {
    "contentful": {
      "config": {
        "spaceId": "CONTENTFUL_SPACE_ID",
        "contentDeliveryApi": "CONTENTFUL_CONTENT_DELIVERY_API",
        "environment": "CONTENTFUL_ENVIRONMENT_ID"
      }
    }
  },
}
ii. Set our variable values on the server.
If you're using Deity Cloud then this is very easy, see.
Log into your cloud box and run the following command.
dcloud env:var <env> <name> [value]
In our case...
dcloud env:var production CONTENTFUL_ENVIRONMENT_ID master
dcloud env:var production CONTENTFUL_SPACE_ID [your id here]
dcloud env:var production CONTENTFUL_CONTENT_DELIVERY_API [your api key here]
7. Finished
That's it, you now have a basic integration with Contentful. Contentful is a really powerful tool and the integration possibilities are endless but the principle should always remain the same.
Happy coding.